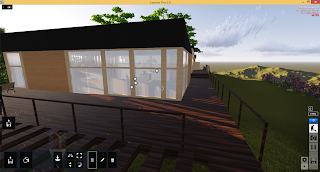
Computer Aided Design (CAD) and Rhino can produce high quality rendering to present your idea and show to others. For our first assignment, we have to produce one 3d model for our design, and I have choosed my previous final project.
And yes, these is all the 'WIP' - Work In Progress.
Use autocad to draw out the plan base on the model from previous final project
Import autocad file in rhino and start to extrude a ground from the plan
Make a different stage for the middle space and add stairs by using the same method, 'extrude'
Extrude the wall , wood plank from the plan and rearrange it in the right order.
Produce window frame and window glass using 'Make Hole', 'Split', 'Boolean Different', and also 'Trim' to bring the detail out .
.
Add door and sliding door for this building
Create door handle for the door using curve and 'Pipe' method
Split the wood plank and rotate it into a correct degree to elevate window.
Produce roof using elevation and extrude it horizontally .
Label each component by using coloured layers
Finally, used Vray to render my final model product
1st space interior
2nd space interior
3rd space interior
Project 2(a)
For this project 2a, student task is to produce two realistic photo with the selected appropriate view of building, and fill with materials. This is to enhance the building itself and improve the visual outcome.
and yet, here's is the "WIP" for this project.
Create contour with using different height of line and
patch it into surface, then trim the extra surface out.
insert the building in the contour and adjust it into appropriate place,
then create one stair for the external space.
start to insert the correct material for every part (glass contour)
insert wood panels material.
insert roof and ground floor.
wooden hand drill
the exterior stair and the path way.
insert the two camera and sunlight according the right angle.
start to render the two angle for the building.
move the two photo in photoshop
background montagae and human figure created.
2nd perspective
Finall this is the result...
1st perspective
2nd perspective
Project 2(b)
This project 2b, students are require to design interior part for every single spaces to enhance the quality of interior spaces.
For my building, it has four different spaces,living room,study room and bedroom.
Here is the 'WIP' for this project 2B
LIVING ROOM
Television
sitting space, sofa, wooden chair, carpet and wooden glass table, lamp inserted.
Final living room space
KITCHEN
Kitchen set
Chair inserted
Detail example plate and pan
STUDY ROOM
Study table

Book shelf

Armchair
Sofa and small coffee table and the final for study room.
BEDROOM
Bed and carpet
cloth accessories cabinet
Small book shelf and lamp
Small study table, computer and chair
TOILET
Bathtub, basin, toilet bowl
OUTSIDE LIVING ROOM
Bench and table
Small detail, sport shoe
After all this, I have choose the suitable material and stick to every object.
Final, camera and lightning inserted to bring out the effect for the interior and then render it out.
And here this is the final two spaces, which is Living room and Bed room.
Living room
Bedroom
Project 3
For this final project of com apps, student require to produce one 90 minutes animation to brings out the idea and explain the whole building that u have design. This also involve a simple editing work using software like Movie Maker, Sony Vegas and so on.
Here is the WIP file:
Using rhino to create different layer for every single material that going to use for the next software
Import the file into Lumion,which is the software that i use to render my video
Edit the material for every single part by refering back to the work that i have done in 3DS Max
Adding in furniture for every spaces
Design the surrounding by adding trees and so on
Start to capture the starting point and the ending point to create the pathway for recording
arrange all when done with every section for the video,
start to render the video out for the next editing
move all the short video in to Movie Maker and finalize it into one animation video.
Here is the final video:-


